The Basics of Using Dreamweaver- Page PropertiesAuthor: Mark
Reynolds Setting Page PropertiesNow what we want to do is to get rid of that bland white look of your page. Modify» Page Properties. You will be presented with this window:
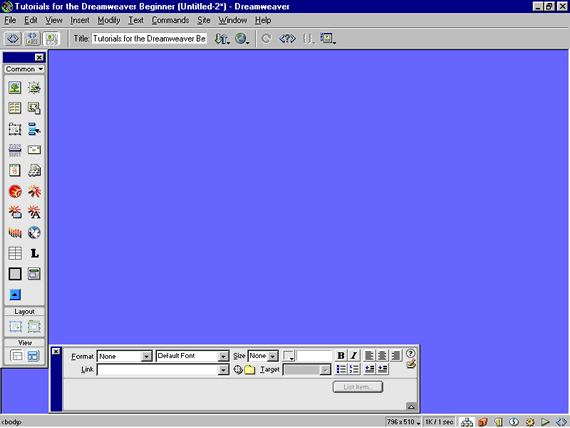
Have you ever looked at web pages at the top where the blue bar is and seen a title and thought to yourself “How do they do that?” Well this is how. See where it says title at the top? Put your page title in there. I have put “Tutorials for the Dreamweaver Beginner” in there. Now click each box with a little arrow in the bottom right hand corner to choose your colors. At this stage do not put anything in the background image box and leave the rest of the boxes at their defaults. Click OK and you are done. Voilá!! You have just set the page up to your colors! Oh! And what’s this? The blue bar at the top has changed as well to your title. Clever eh?
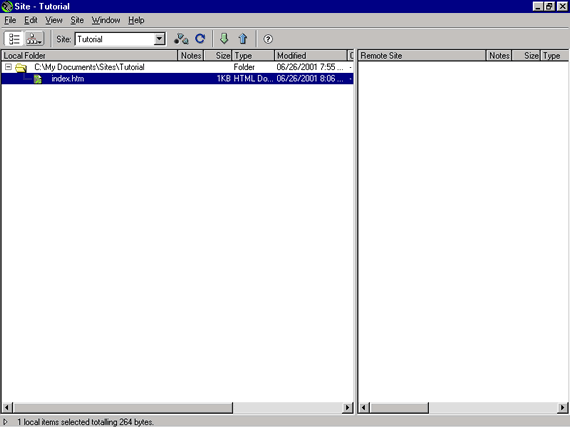
Now what we want to do is to save this page. Because this is going to be our home page, we need to save it with a name that your website host recognizes as a home page. In this case it is going to be index. Notice I have done it all in lowercase. Get used to this because if you start to use upper case names then the web host may not recognize it. Another tip while we are on the subject, never use spaces in the name of files. Use an underscore ( _ ) to fill in spaces. This again is due to some web hosts filling in the gaps and you end with no pages being displayed or the wrong one! OK, enough of that. Time to save your file. File» Save As, type in index (or whatever your homage should be). Make sure we are under the root folder, (Remember how to do that?) and click Save. The htm extension is added automatically for you. Click on the site window button at the bottom of your screen so we are back to the site map. Here you will see your creation as index.htm. Notice how the left hand pane is showing the “local files” and your index.htm page is there for you to see. Hopefully below your root folder. In my case it is here for you to see as C:\My Documents\SITES\Tutorial.
Right that’s the first part done, "What there’s more" do I hear you ask? Yes there is a lot more yet, that was the easy bit. What we have to do now is to start putting images and text on the page. |
« Previous | 1 | 2 | 3 | 4 | Next » |
::This page last modified 8/13/2013 at 03:37::
 |
Copyright
© 2001-2026 DreamweaverFAQ.com All Rights Reserved. All brands, trademarks, tutorials, extensions, code, and articles are the property of their respective owners. A production of Site Drive Inc. Legal Notice | Privacy Policy | Disclaimer & Notice
|
 |


