Creating a Multiple State Navigation BarAuthor: Kim
Cavanaugh IntroductionOne of the more popular navigation features on the Web is the tabbed interface that simulates the appearance of file folder tabs for site navigation. Most people are quite familiar with file folders, so this simple interface can create a comfortable experience for viewers and allow them to quickly find your site's navigation features and begin moving through the site. In this project, you'll learn not only how to create the graphical interface that uses tabs as the primary means of navigation but also how you can add to your site's usability by employing multiple instances of a navigation bar. So what exactly is a multiple state navigation bar anyway? Simply put, a multiple state navigation bar displays the Down state of a button to give your site's visitors a visual reference as to their location within your site. Some of the most popular sites on the Web use this navigation scheme because it is simple and intuitive and yet allows the site a great deal of depth. Fireworks has allowed for the automatic creation of multiple-state navigation bars since version 3, but the process has become much simpler, and a more intuitive with the addition of the Property inspector in Fireworks MX. Goals of this TutorialIn this tutorial you will learn the following:
Understanding Button StatesBefore we begin, let's review the uses of button “states” and how they help define where your visitor is when they view your site.
Using the Button EditorIn this tutorial you'll build a component for a web site—a navigation bar with buttons arranged horizontally. In this case the navigation bar is a component intended for insertion into your pages as part of a Dreamweaver template. While there are many ways to compose pages in Fireworks this example assumes that this is just a part of the overall page design. Start by creating a new document in Fireworks with a canvas size
of 500 pixels wide by 40 pixels high. Set the canvas color to white
and save the file as navbar_practice.png.
In addition to creating this file, use your computer's Explorer
or Finder controls to create a new folder named navbar
on your hard drive.
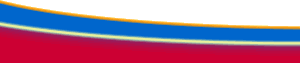
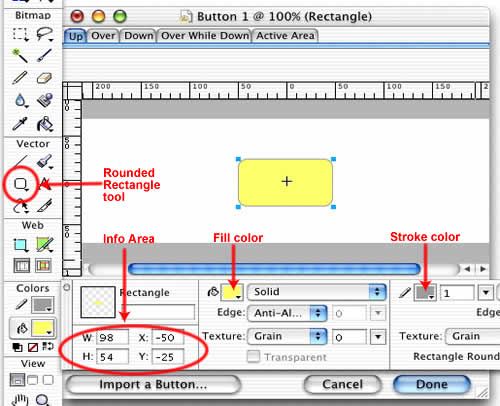
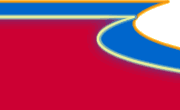
To remove the bottom part of the rectangle, select the rectangle and use the Knife tool to cut the lower portion of the rectangle. Hold down SHIFT while dragging the Knife tool across the object to draw a straight horizontal line. After the rectangle is cut, click once on the canvas to deselect the rectangle and then use the Pointer tool to drag away the lower portion of the object, as you see in this illustration. With this lower portion selected, you need only press DELETE to remove it from the Button editor's canvas. This illustration shows the first two steps of the process.
|

::This page last modified 8/13/2013 at 04:37::
 |
Copyright
© 2001-2026 DreamweaverFAQ.com All Rights Reserved. All brands, trademarks, tutorials, extensions, code, and articles are the property of their respective owners. A production of Site Drive Inc. Legal Notice | Privacy Policy | Disclaimer & Notice
|
 |